Firebase Hosting is a part of Firebase platform, the integrated real-time database, cloud functions, app auth, etc. But you can use just the Hosting feature.
Suppose you have a single-page app that builds a complete site with index.html and index-63gsxn38.css etc. All the files you need for static hosting. There are many options for hosting and exposing these via CDN such as Netlify, AWS S3 + CloudFront, Vercel, or your own Nginx server. But this guide is focussing on Firebase Hosting.
In my case, I can run bun run build and then the ./dist/ directory has everything. It has a /index.html, some .css, some .js, some favicon.svg, etc.
You can create the project in the Firebase Console, first, but you can leave that to the CLI. To get started, position yourself in the projects git repository root. Not inside the ./dist/ directory. It's going to ask you about adding GitHub workflow files, which I'm going to accept.
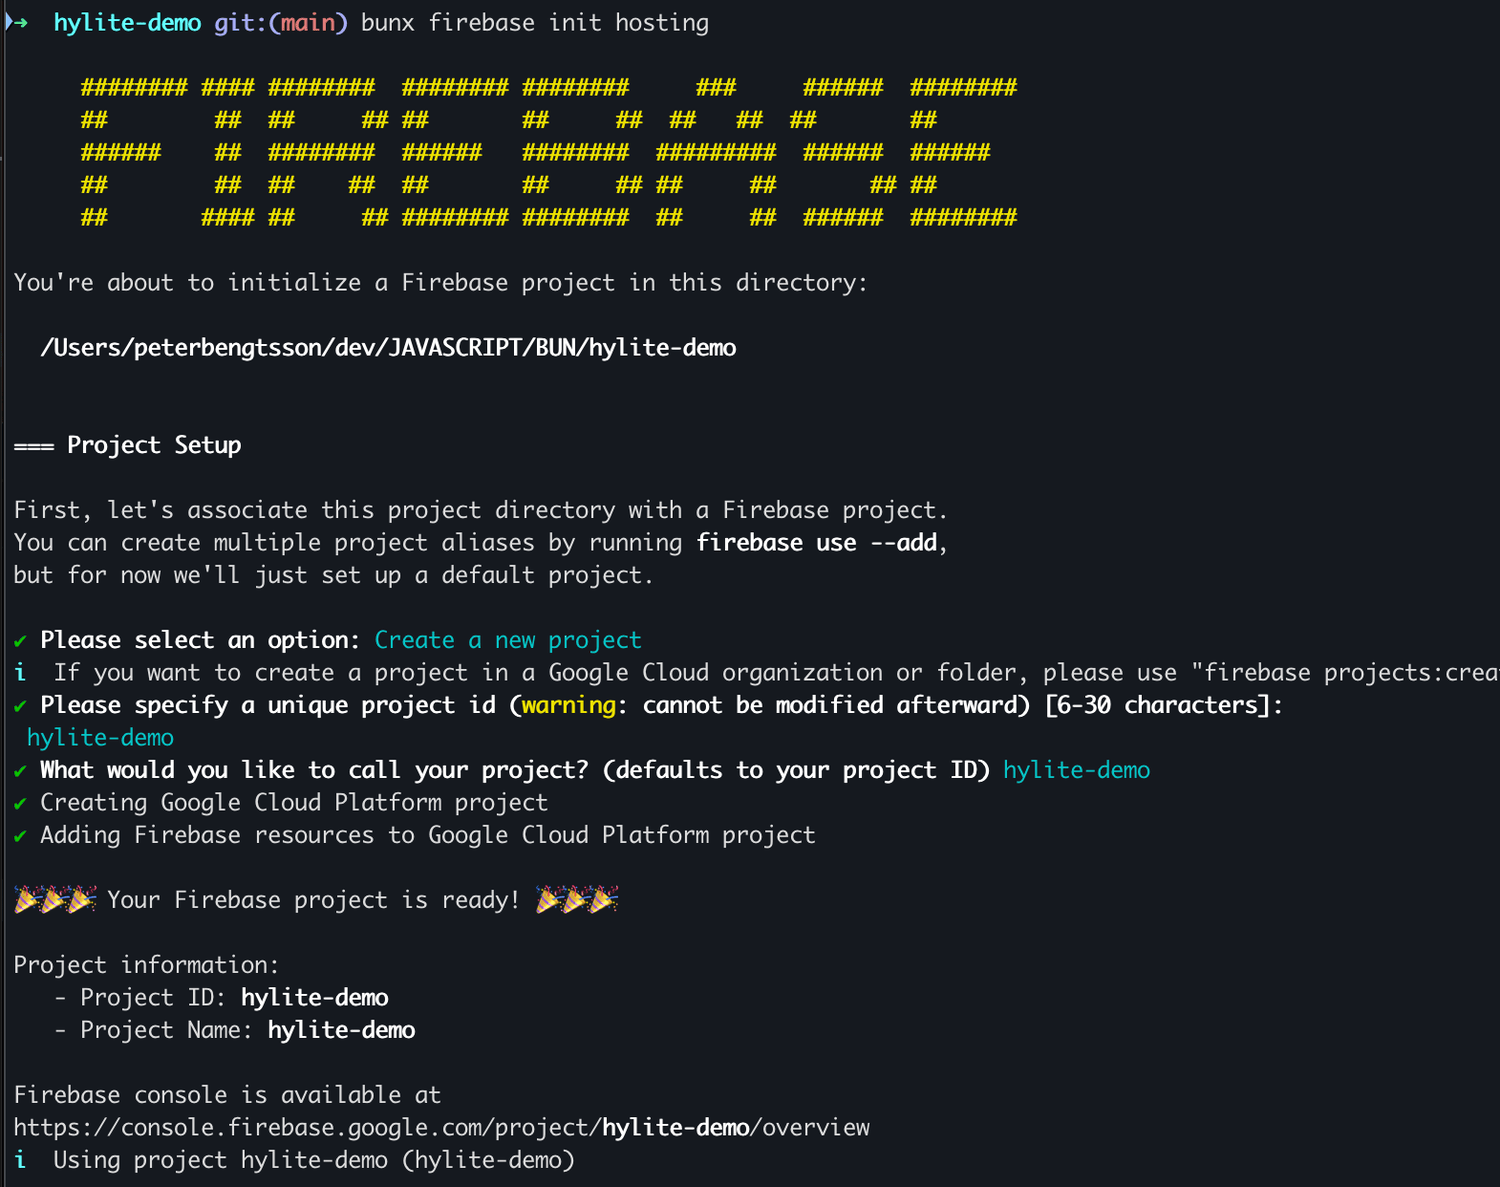
bunx firebase --version
bunx firebase init hosting
It will ask serveral questions. In my case, it picked a default name for the project ID (and project name) to be that of the directory that the git repository root is in. So if you did cd ~/myprojects/that-webapp && bunx firebase init hosting it's going to suggest to call the project that-webapp for the project ID.
Next question is going to be the name of the project. It defaults to be the same as the project ID. But this is where you might, for example, call it "That WebApp". Unlike the project ID, this name does not have to be globally unique.
In my example, I get this lovely output:
The next step is specifically for Hosting. It'll ask you some details such as what is the "public directory". In my case, I had to replace the default suggestion (public/) for what my output directory is called; dist/.
Next, it's going to ask you about setting up the relevant files for GitHub Workflows to auto-deploy. You can say yes to all the GitHub deployment related questions, and tune the code it generates, later.
When it's done, it'll have generated these files:
.firebaserc: information about the Firebase projectfirebase.json: configuration for the hosting.github/workflows/firebase-hosting-pull-request.yml: so each PR gets its own temporary site.github/workflows/firebase-hosting-merge.yml: for pushing the deployed site into production when you merge pull requests
Now, create a PR with all these new files. Here's one such example PR.
What you should be aware of, with the CLI, it will authenticate to your GitHub account so that it can go in to your repository settings and add the necessary credentials as repo secrets.
Note, it's likely not going to work at first. In my case, the initialization CLI asked for the instructions for building the site. But what's missing from the GitHub Action workflow, is how do you get the runtime. I had to make this change manually:
diff --git a/.github/workflows/firebase-hosting-pull-request.yml b/.github/workflows/firebase-hosting-pull-request.yml
index 8cd1813..0479a03 100644
--- a/.github/workflows/firebase-hosting-pull-request.yml
+++ b/.github/workflows/firebase-hosting-pull-request.yml
@@ -12,7 +12,9 @@ jobs:
     if: ${{ github.event.pull_request.head.repo.full_name == github.repository }}
     runs-on: ubuntu-latest
     steps:
-      - uses: actions/checkout@v4
+      - uses: actions/checkout@v5
+      - uses: oven-sh/setup-bun@v2
+      - run: bun install
       - run: bun run build
       - uses: FirebaseExtended/action-hosting-deploy@v0
         with:
Once your "Deploy to Firebase Hosting on PR" workflow works and passes, you'll see a comment on the PR, like this:

Domain name
By default, it will deploy your site to a domain that is https://your-project-id.web.app/. https://hylite-demo.web.app/ for example.
Suppose you want your own domain there instead of web.app. You can accomplish this by adding a CNAME for your domain name. To get started, start within the Hosting portion of the Firebase project's Build settings. Find Hosting, and look for this button:

Follow the steps and when you get the last modal, copy that into your DNS provider. After you've done that, come back to the Firebase hosting setup and press "Verify"
That's it. All you have to do now is wait for a cert to be generated and propagate to DNS.
In my example, when all is done I have a custom domain name pointing to a kick-butt CDN that is as easy to deploy to as merging a PR: https://hylite-demo.peterbe.com/
Optimizations
One thing I often like to do is to inform Firebase Hosting, which URLs can be cached aggressively. Here's a great example of an addition to the firebase.json file:
diff --git a/firebase.json b/firebase.json
index 6564edd..533e3e6 100644
--- a/firebase.json
+++ b/firebase.json
@@ -7,6 +7,17 @@
         "source": "**",
         "destination": "/index.html"
       }
+    ],
+    "headers": [
+      {
+        "source": "/assets/**/*.*",
+        "headers": [
+          {
+            "key": "Cache-Control",
+            "value": "public,max-age=315360000"
+          }
+        ]
+      }
     ]
   }
 }
I think it's self explanatory what it does. It can be a smidge tricky to get all of these right but thankfully the documentation is great.
Comments